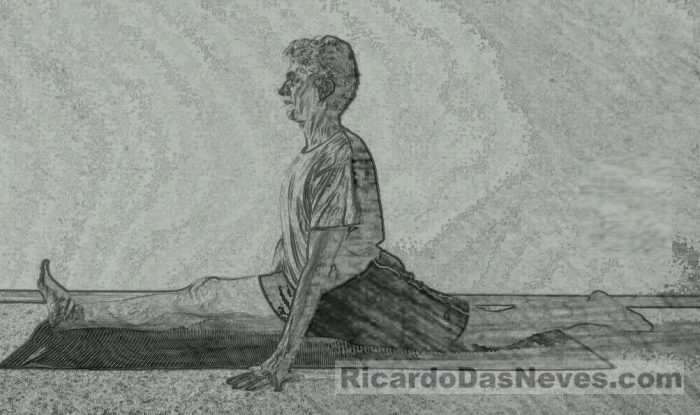
If sitting in lotus position announces to the world that you, too, practice yoga, then doing the splits announces that you, too, have the flexibility of the yoga-practicing elite.
As we all know (ahem!), yoga is not about doing poses. It’s the feeling of connection to your body while doing the poses. This means that some yogis’ fixation with doing amazing things is just ego stuff.
That being said, while I still have an ego and, I’m guessing, you do too, let me show you how to do the splits, in case it’s useful.
First of all, not everybody should be trying to do the splits. If you have osteoporosis, arthritis, or need knee or hip replacement surgery, please do me a favor and choose walking or swimming instead. Ditto if you have any other garden-variety muscle, nerve or skeletal issues that even a five-year-old would go, “I don’t think you should be trying this, grandma.”
So:
1. Before you get on your mat, be sure it has plenty of cushion for your knees. Though the pictures here do not illustrate this, you could either double up on your mat or put your mat on a carpet or similar soft surface.
2. Get into a lunge position as illustrated: right foot forward and directly between your hands. Left knee on the floor. If you have difficulty reaching the floor with the hands, use yoga blocks…or if you don’t have any, rest each hand on a thick, long-winded religious treatise.
3. Breathe. This pose actually starts in your mind. You are not acquiring flexibility, you are returning your legs to their natural state of flexibility. Someone pointed out to me that when you’re unconscious—when you are on an operating table—doctors can move your legs any which way they need, including putting you into the full splits. So there’s nothing physically structured into your body that makes for tightness—just residual muscular tension. Put differently, you’re not tight; you just have a consciousness of tightness, and that’s what we can breathe away.
4. After three slow breaths, straighten your front knee and raise the ball of the foot off the floor, as pictured. I call this the “pre-splits.” Stay for five slow breaths.
5. Now begin to slide your right heel forward, as pictured. If necessary, support yourself on your blocks/books, or hey, even add to them. After all, how long has it been since you put to good use The Complete Works of William Shakespeare?
6. Now is the time to stretch intelligently. As usual for any position, pain is your counselor. It tells you where you should stop. If you feel pain, or if you’re holding your breath, or if the intensity is so great that you’re dying to come out of the pose, then back off, either by coming higher up on the base of your fingers or adding the large-print edition of War and Peace under one hand and Gone with The Wind under the other. No leaning forward; instead, keep your back upright. And keep your left knee pointed down, as illustrated.
7. Now here’s the secret to the pose: forget about trying to stretch further. Instead try to relax more. Breathe slow, rhythmic breaths into your pelvic floor, your right hamstring and your left quadriceps. Remember: you don’t return your legs to their natural state of flexibility by brute-forcing your way through, but rather by relaxing into the pose. Stay for 10 to 20 long breaths.
8. Repeat each of these steps on the other side.
Benefits: A more relaxed lower back, especially if your hamstrings are habitually tight. Better range of motion in your hips, your hamstrings and your quadriceps. Bragging rights to your spouse, your children, and your organic-produce person at the farmer’s market (who listens politely but couldn’t care less).
Avoid if: For any of the reasons laid out at the beginning, or if anything else hurts while in the pose, skip this. Differentiate between discomfort and pain: if you’ve never stretched like this, you’re bound to encounter discomfort; but if you’re in the grin-and-bear it camp, or you’re shallow-breathing to get through the pain, then, seriously, back off or do something else.
Final thoughts: For many people, this is the knee-jerk questions after test-driving this pose (also known in yoga as hanumanasana, incidentally): “How long till I can do the full splits?”
I don’t know what the answer is for you. All I know is that I’d been trying to do the splits for years and never sinking anywhere near the floor, until I took that workshop with the guy who said, “You’re already flexible; you’re just returning to your natural flexibility, and if you don’t believe me, look at what doctors can make your body do when you’re passed out on an operating table.”
After hearing that, I was in the full splits the following week.
I’m just sayin’.
Like elephant yoga on Facebook.
Ed: Bryonie Wise


 Share on bsky


Read 13 comments and reply