
It was about six months ago when I decided to make a straight line handstand a serious goal.
In the beginning it felt very awkward, but like anything else, you get more confident with practice, and I practiced hand balancing at least five days a week.
After about five months, I was still doing the classic “banana” handstand; I couldn’t get my body into a straight line. When you do something every day you feel as though you are certainly improving, but I wasn’t. If I was, it was at a very slow pace, because the way I was training—back-against-the-wall handstand and practicing kicking up in the open floor—was not effective.
During the fifth month of my journey to a straight line, I moved to Boulder, Colorado. I made the move to train with Matthew Bernstein, a movement and gymnastics coach at Crossfit Sanitas. As a student of Ido Portal, I knew exactly what Matt was about. I knew if I came here and trained with him as much as I could, I would get massive improvement in a shorter amount of time.
I was right.
From month five to six, I went from looking like a banana and not being able to hold a handstand to a 60-second freestanding straight line.
Here are the three exercises that I learned from Matt that dramatically transformed my handstands:
First, always make sure that you warm up your wrists thoroughly before engaging in any type of hand balancing work. The wrists are not designed to support weight, but with proper strength and mobility exercises, they can become much more durable.
First, knuckle raises:
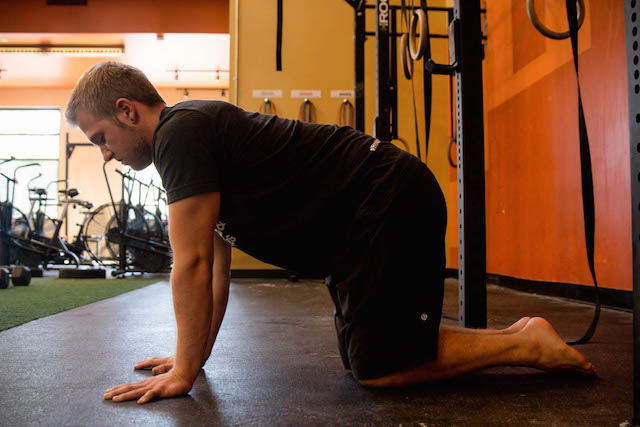
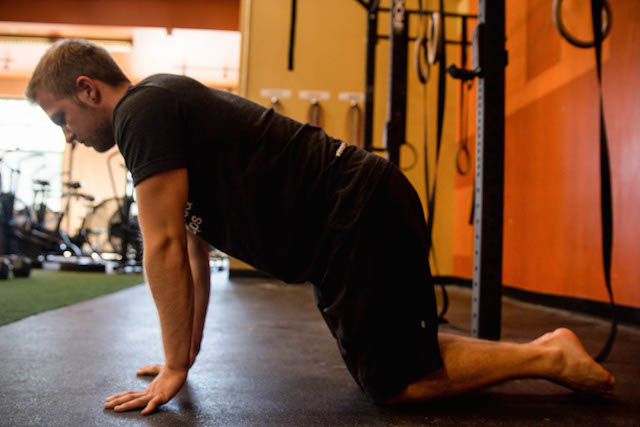
Begin on all fours with your knees and hand on the ground. Next spread your fingers apart with your index fingers pointed straight. With straight arms, shoulders over your hands, and the weight poured in-between the index and middle finger knuckles, slowly raise your palms off the ground and lower down for three sets of 20 reps.
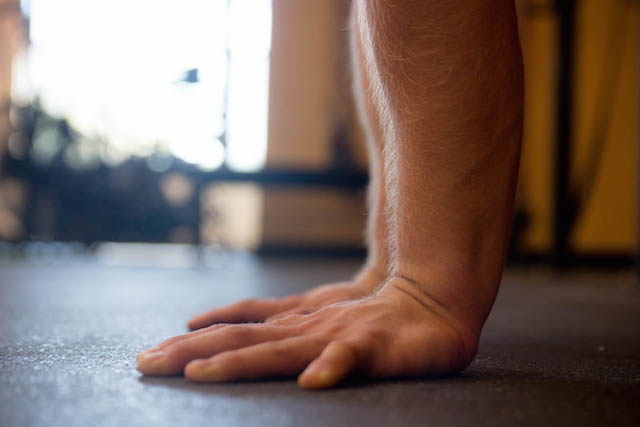
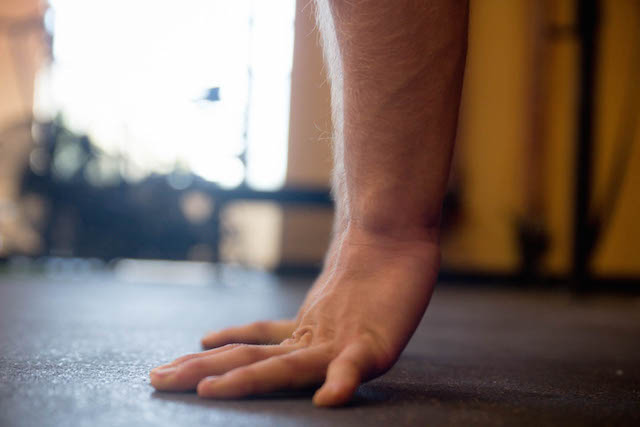
This exercise builds wrist and forearm strength that gives you more control and the ability to prevent yourself from toppling over when you are losing balance.
PVC floor drill:
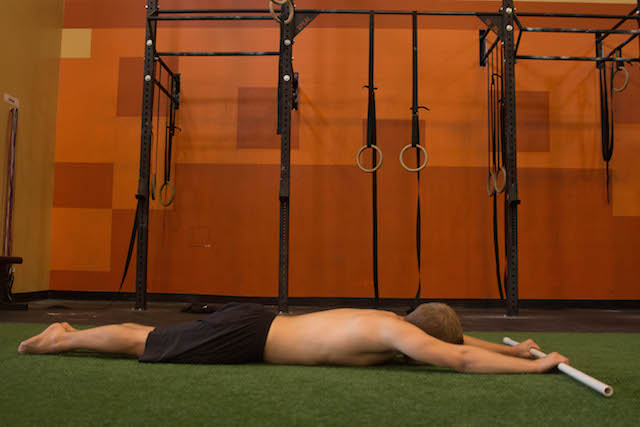
This exercise builds lower trap strength and teaches your body and brain how to hold a proper handstand position. You start by laying flat face down on the ground with your feet together and arms above head, holding a PVC pipe in your hands.
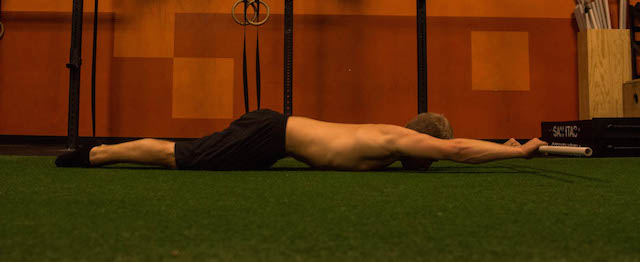
While keeping your thighs, face and chest on the ground, squeeze your butt and tilt the pelvis so that only your abs are off the ground. Next, lift the PVC pipe about two inches off the ground and hold this position for three sets of 60 seconds each. The wider you grip the PVC pipe, the easier it will be to hold.
Wall-facing handstand:
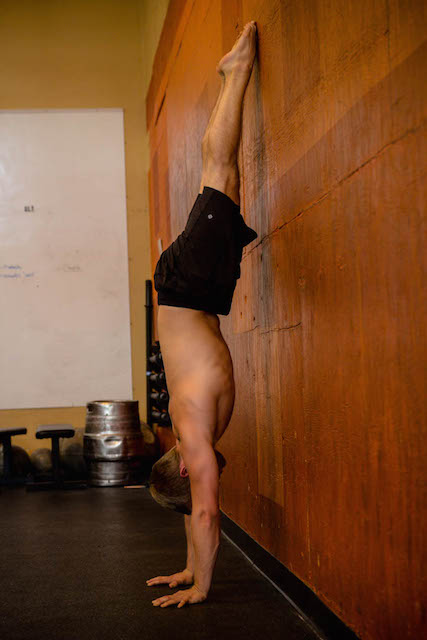
Get into a handstand facing the wall with your hands about one foot away from the wall. Make sure your fingers are spread and index fingers are pointed forward. Keeping your toes pointed and against the wall, squeeze your butt, push through the shoulders into the ground, and tilt your pelvis to engage your abs (the same position as the PVC floor drill). Always make sure to externally rotate your arms to create torsion for a more stable position. You will be holding the same position during the PVC floor work exercise as you will against the wall. Hold this position for three sets of 60 seconds each.
These exercises build strength and teach your body how to hold the correct position for a handstand. After practicing on the floor and against the wall, this position will later translate into your free-standing handstand, giving you a straight line.
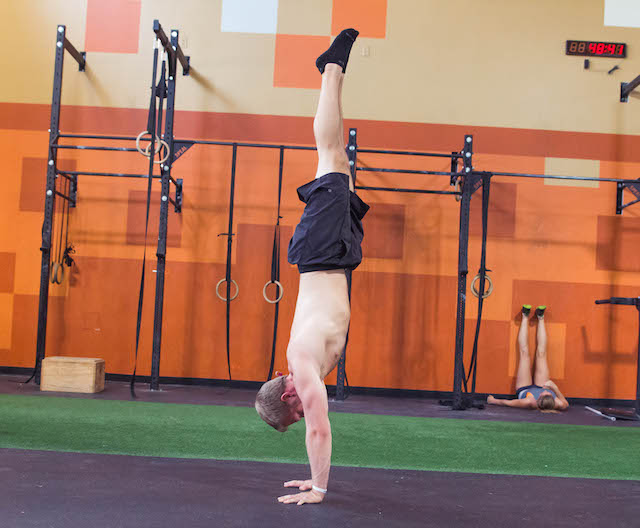
I find it common that people (including myself) want to get ahead of the game and start practicing things they are not ready for. Oftentimes, we need to be focusing on just practicing the basics.
The lesson here is to not get ahead of yourself with this type of thing. Everyone wants to do freestanding handstands on the open floor, but many of us haven’t spent enough time practicing the basics that allow us to hold a good position.
~
Relephant Read:
Do This Practice & Nail the Handstand.
~
Author: Ross Johnson
Editor: Toby Israel
Photos: Author’s Own
~

 Share on bsky


Read 5 comments and reply