Editor’s Note: We lovingly assume zero liability for the choices you make on or off the mat. Be kind to your body!
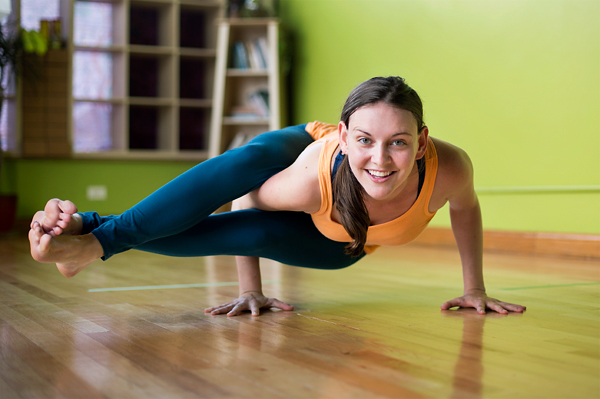
So you want to learn 8-angle pose?
This intermediate arm-balancing posture requires hip opening, a twist, and the ability to maneuver in and out of it with strength and ease. For some people, astavakrasana is simple to learn, and for others, it takes years. The only universal statement about this pose (and every yoga pose for that matter), is that each individual’s learning path is unique.
The best advice I ever received about teaching yoga was, “share your practice.” So as someone who has also been through the learning stages of this potentially confusing arm-balancing posture, the only thing that makes sense to me is to share how I learned it, and perhaps my learning path can help illuminate the dark scary parts of yours.
So, without further adieu, here is how I learned Astavakrasana:
-
Chaturanga
By the time I approached astavakrasana, I had a fairly consistent and doable chaturanga, and for better or for worse, the base of 8-angle pose is yoga’s favorite push-up.
My chaturanga was consistent and doable enough that I didn’t have to think about my upper body as I worked forward into 8-angle pose–it was instinctual and allowed my attention to focus on other things, like the twist in my core and legs.
But if your chaturanga isn’t very consistent or very doable, your experience of astavakrasana might be different. But just because you haven’t mastered chaturanga doesn’t mean you can’t approach 8-angle pose. It means that it’s probably time to chunk up your chaturanga into something that is more consistent and doable. This is often why teachers recommend putting the knees down on the floor for the plank push-up position, because chaturanga is a posture that is easily broken in half and practiced piece by piece.
Once you’re practicing with knees down on the floor, your attention is freed to establish good habits in the upper body movement which is the hardest movement to master in the full posture.
Start experimenting with where you place the hands, how close to the body you place them, and how far forward your heart reaches as you lower from top to bottom. One of the key rules for arm balances is that the heart needs to be positioned forward of the wrists and hands, which feels vulnerable at first (and potentially scary), but eventually it feels second-nature with enough consistent repetition.
When chaturanga becomes consistent and doable in the upper body, the foundation is set for 8-angle pose.
2. Hips
Limitions exist in the mind, not the body, and this is something to keep in mind when we consider that Astavakrasana is the little sister of any pose where the legs are behind the head, which means it requires some pretty intense hip opening.
This is the part of yoga that is potentially really unfair if you’re the kind of person with really tight hips. But life was never promised to be fair—it was only promised to be exactly as it is, which is the lesson we must work with as we approach the pose.
For 8-angle pose, it’s best to warm the hips in all directions, but the direction that’s of particular use for the peak pose is external rotation. Working with Warrior 2 (virabhadrasana II), extended side angle (utthita parsvakonasana), yogi squat (malasana) and other externally rotated hip postures will help prepare the hip joint to move into astavakrasana.
3. Torso
Astavakrasana is both a twist and a side stretch, so the torso must be both strong and open to approach the full pose.
My body is fairly pliable, which means my pitfall is over-stretching, but if your body is tight, you might find that your pitfall is the frustration that (potentially) arises when the body meets its limit at the first hint of stretch. In either case, the remedy is three-dimensional diaphragmatic breathing, moving without desire, and dialing back the intensity of the stretch to 80%, which allows for safer and calmer adjustments if and when you choose to deepen.
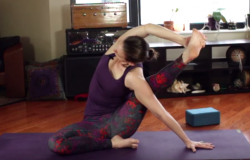
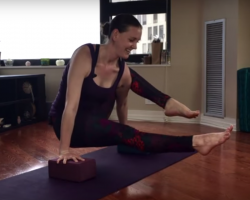
The required side-stretch is one that brings the same-side armpit and knee together, and is usually prepared with compass pose (parivrtta surya yantrasana), which is how I prepare my side stretch in the video below.
But I’ve also found prepping with other side stretches to be quite useful, especially if I haven’t practiced side-bending in a while. Adequately preparing my body’s readiness for the stretches is important because if I prep my hip and torso stretches well, they too become background elements of my astavakrasana, freeing me to pay attention to the posture as a unified experience rather than a composite of individual components glued together.
If your torso needs significant prepping (more than a single compass pose), try some standing half moon lateral stretches (urdhva hastasana ardha chandrasana), seated revolved head-to-knee pose (parivrtta janu sirsasana), or a reclined banana posture (bananasana).
Once the torso gains length, the twist will become much more accessible. And because the twist is one of the last components added into 8-angle pose (it shows up during the transition–after the hips, side-stretch and arms are set in place), it is a byproduct of the openness of the hips and torso, and is reinforced by the upper body’s ability to do chaturanga. This means that the twist is actually constructed and held together by the pose’s other requirements, making it more effortless than strived for (one would hope).
4. Transitioning in and out
I, like many other Americans, have been conditioned to rely on results as a measurement of success, and I notice that the most frustrating part of project poses happens right before I enter the posture, when I encounter my desire to achieve it.
My attachment to desire is actually one of my favorite things to explore, which is why project poses have always felt so natural for me to pursue. I experience a great value in understanding when and why my desire flares up, and I enjoy noticing what happens when I pursue something with desire versus pursuing a pose with steadiness and ease. Sometimes desire is pretty sneaky, masking itself as curiosity or determination, and this is also fascinating to me. How I am in yoga is how I am in life, so project poses reflect back to me my biggest ego grips, trips and hiccups, which is often painful and totally necessary.
My biggest challenge in project poses is to move without desire, and this pursuit is best experienced on the transition in and out of the postures because the transitions are so multi-faceted. With so much to pay attention to, it’s easy go in and out of the attentiveness of the present experience and be carried to and from the pose by momentum and luck. It’s also easy to override the attentiveness of the present experience with the ego drivel of desire–voices demanding performance and outcomes.
Before I enter the pose, I must set my internal atmosphere and be vigilant of my alignment as I enter the posture. This is where I use my most handy tool of all: the pause.
Before I enter the posture, I establish with myself what a pause should feel like (sometimes referred to as “intention”). I establish with myself that in a pause, I should be able to feel my entire body participate with equal effort. I should be able to breathe fully and three-dimensionally in my lower abdomen. I should feel alert and relaxed and empty of agenda.
I establish my pause before I enter the posture, in a position where the pause is free and accessible, and I use it to guide me through the posture. When I feel desire, over-effort or confusion, I use my pause to help me understand my experience, and this is what eventually takes me from not knowing a posture to knowing a posture.
As for astavakrasana, there are a few go-to instructions for physically entering and exiting the posture, which I have outlined in the video below (a 25-minute astavakrasana body-prep guide). The main entrance works from compass pose (the side-bendy goodness used to prep the hips and torso) to elephant trunk pose (eka hasta bhujasana), which primes the body for arm-balancing.
If this pose feels like it’s taking you to the max, this is probably where the bulk of your learning is for now, and this is where a few well-intentioned pauses might reveal some insight about where to go next.
From elephant trunk pose, the legs clamp onto the arm, and a twist is born as you lower the front of the body into chaturanga.
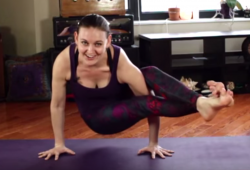
The biggest challenge for me was learning where to place my hands in elephant trunk pose to make chaturanga possible in my upper body, and it basically takes a lot of playing around with.
This is where project poses become fun and experimental, and why it has stuck with me ever since I heard the phrase, “share your practice.”
Namaste.
________________________________________________________
If you’re ready to get on your mat and start exploring and would like some structural guidance for your practice, check out my video below. This is a short practice of preparatory postures for astavakrasana, designed to break down the posture into easily digestible segments, and increase your understanding of what the pose is asking. Have fun, and share your practice! (Oh, and subscribe to my YouTube channel as well, because there are more videos to come!)
More yoga tips from Brentan:
Making Headstand Possible. {Yoga Video}
A Guide to Pain-Free Backbends. {Videos}
Author: Brentan Schellenbach
Editor: Renée Picard
Images: via the author





Read 1 comment and reply