My relationship with food is complicated at best.
I brutally cut foods from my diet one at a time while I was struggling with eating in college, eventually forcing my brain to have negative associations with them. Even now, certain foods evoke more hatred and anxiety than others. It’s been about five years or a bit more since I’ve eaten a slice of bread, and not because I’m gluten intolerant or feigning to be a caveman.
My avoidance is purely emotional. Just hearing the word bread brings up connotations of hatred, loathing, stress, and pain.
But this is not a hate story; quite the opposite in fact.
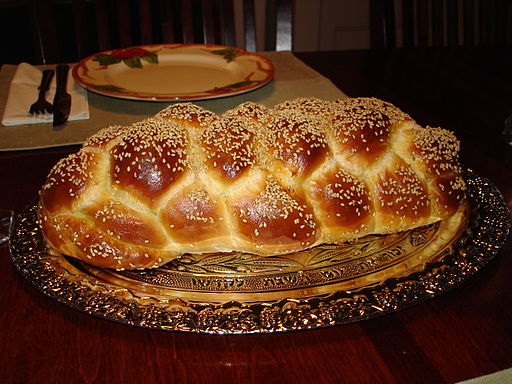
Last week I was invited to witness the transformative journey of flour and yeast into traditional Challah bread. The recipe is simple, and the process familiar to anyone who has baked bread before. And yet there is something particularly delicious and delightful in the bread that goes beyond the ingredients.
Lately I’ve found myself in the company of some amazing people who happen to love food. Of course I worried that my own feelings of cuisine disdain would be reflected in their feelings for me. Instead, I was served only what felt safe to me.
Over time, I watched countless meals prepared and eaten with care and love and true enjoyment, nourishing the body and soul. I wanted to be a part of that—part of the tradition and part of the sharing. It was less about the bread and more about the acceptance it represented.
But still, with one bite of the soft, airy, savory sweet challah, all and any negativity I had for bread disappeared.
Anyone who tries this recipe can rest assured that you will never hate bread again.
The Recipe
Makes one loaf or braid
The Ingredients:
- 2 cups flour
- 1/2 tbsp oil
- 1/4 cup honey
- 1/2 packet of dry yeast
- 1/2 tbsp sugar
- 1/2 cup warm water
- 1/2 ish salt
The Process:
1. Warm your oven to about 100 degrees Fahrenheit so that you can allow the dough to rise.
2. Pretend you’re hosting a Food Network show and prep all of your ingredients in separate bowls. That way, everything can be added at exactly the right moment.
3. Measure out the flour. If you are lucky enough to have a kitchen scale, weigh it. The amount of flour may need to be adjusted later in the baking process to achieve the proper consistency. As my baking mentor explained, the most important part of baking anything is knowing how the dough should look and feel.
4. Measure out the oil and honey. Any kind of oil is fine, we used canola oil and standard grocery store honey.
5. Pour the yeast into a warmed bowl with the warm water. The water should be about 100 degrees Fahrenheit. Swirl the mixture together and then let it sit four about four minutes, or until it looks and smells like yeast (alive). Then add in the sugar.
6. Pour the oil and honey into the yeast bowl. Before adding then add the combined ingredients into a stand mixer.
7. Turn the stand mixer on low, and slowly add in the flour. When about 3/4 of the flour is added, pour the salt into the dough to stop the yeast from flowering too much. Keep mixing until the dough pulls away from the sides of the bowl and forms a ball. If the dough is very moist or sticky, add a bit more flour.
8. Change the mixing paddle to a folding hook, and put the dough back on the mixer for about twelve minutes.
9. Transfer the dough to a large bowl with enough room for the dough to double in size. Cover the bowl of dough with plastic wrap and place into the warmed oven for 90 minutes to let it rise.
10. Once the dough has doubled in size, take it out of the bowl and shape it. Preheat the oven to 350 degrees Fahrenheit. You can shape the dough into a loaf for delicious sandwich bread, or divide the dough into three or four rope-like strands, and braid them together. Once shaped, transfer the dough to a loaf pan or baking sheet lined with parchment paper.
11. Before baking, brush the dough with an egg wash. To make the egg wash, crack and egg into a small bowl, add a bit of water, then beat it. Just beat it.
12. Bake the bread for thirty minutes, or until golden brown on top. Try to let it cool a little before devouring. The only thing that might beat a piece of plain, warm, fresh bread is challah french toast, if you have the willpower to save some of the bread for about a week.
*side note: I live in Florida, so anyone baking at more than five feet above sea level might need to adjust time and measurements accordingly
Author: Gabriella Sweezey
Editor: Renée Picard
Photo: via the author/Wiki Commons


 Share on bsky


Read 3 comments and reply